Logtivity gives you one place to monitor changes and activity across all your WordPress sites. Thanks to the “Webhooks” feature, you can also do anything you want with your Logtivity data.
This feature was built for Logtivity customers who have their own reporting systems, for clients and for internal use. It’s also possible to use webhooks to send data to Zapier, IFTTT, and other platforms.
An example of working with webhooks
For this example, I’m going to integrate Logtivity with Zapier.
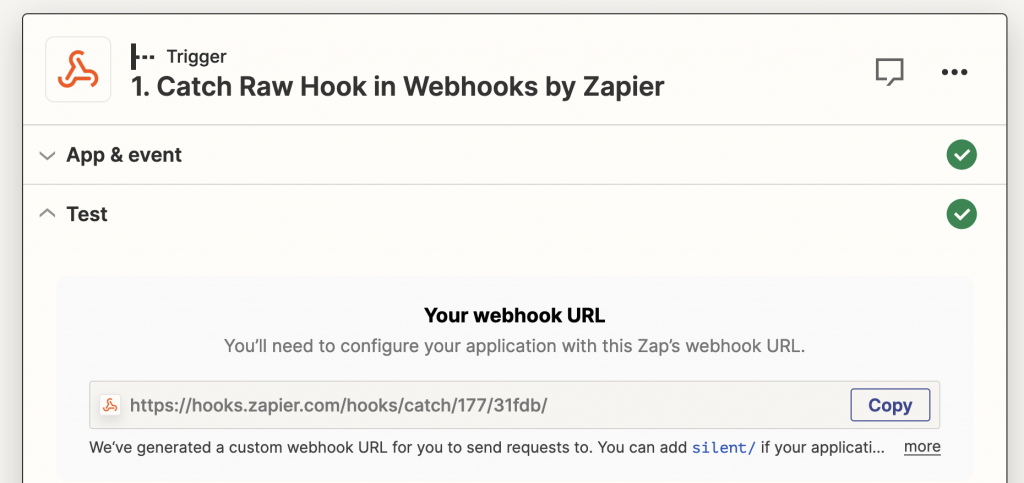
- The first step is to create a Zap inside the Zapier dashboard. In this screenshot, I’m creating a Zap using the trigger called “Catch Raw Hook in Webhooks”
- Inside your Logtivity account, go to “Team Settings” then “Integrations”.
- Choose “Webhook” and enter the URL that Zapier gives you for the webhook.

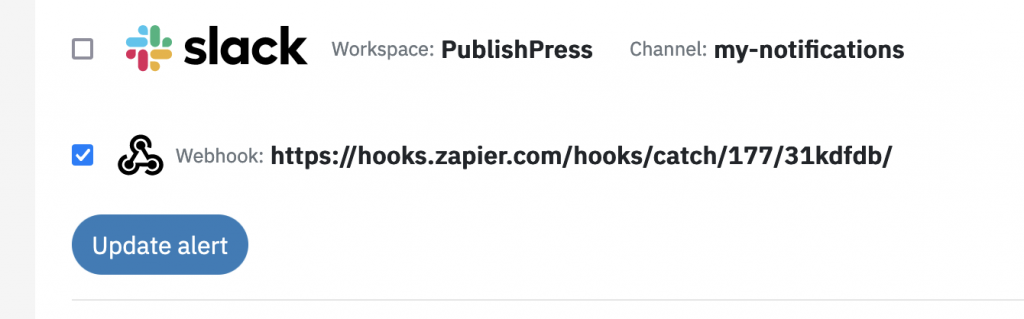
- In your Logtivity account, go to the “Team Settings”, then “Activity Alerts”.
- Edit an alert. For example, you may have an alert that notifies you whenever a plugin is updated.
- Choose your new webhook and click “Update alert.”
- Go back to Zapier and test your Zap. You should see a request similar to the screenshot below. This is a plugin update alert.
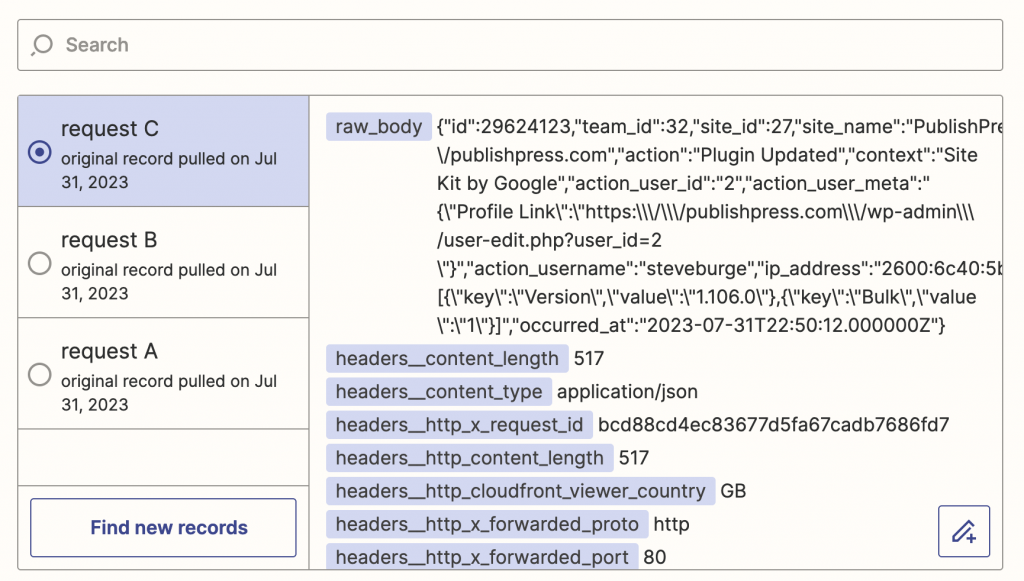
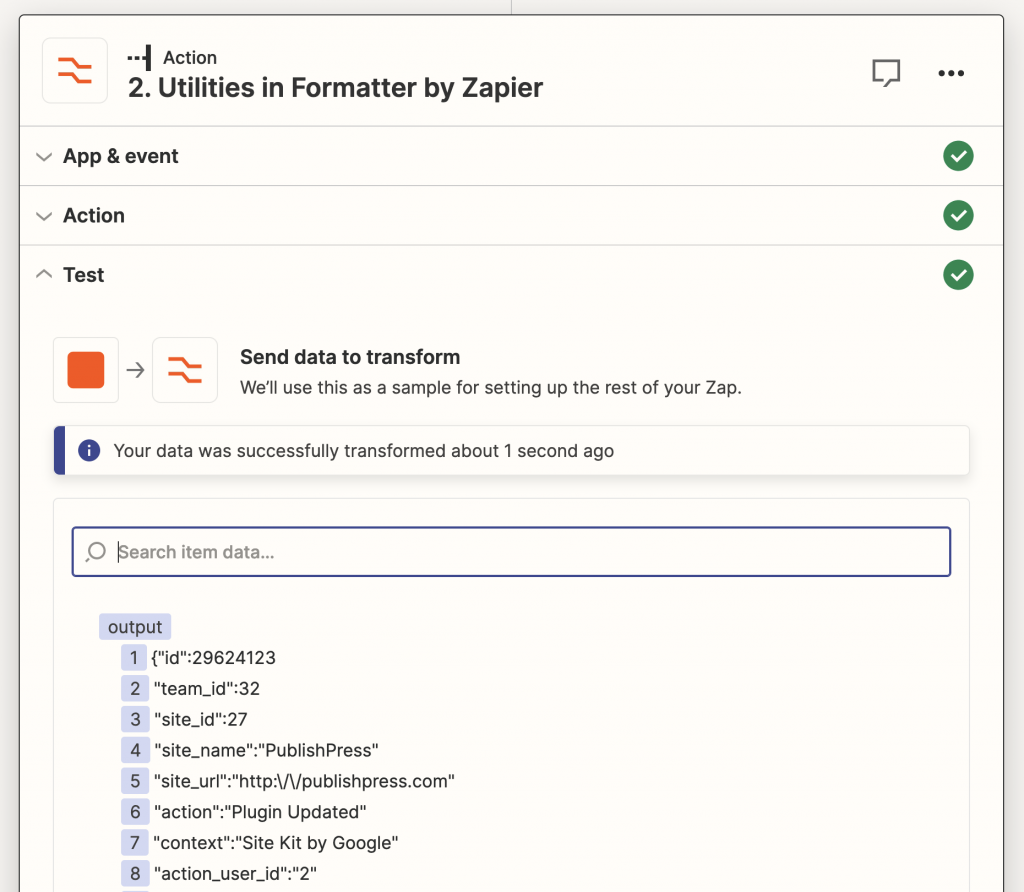
Here’s a full look at the body of the webhook. This an example of the data that you can take from Logtivity and pull into your own internal systems:
{"id":29624123,"team_id":32,"site_id":27,"site_name":"PublishPress","site_url":"http:\/\/publishpress.com","action":"Plugin Updated","context":"Site Kit by Google","action_user_id":"2","action_user_meta":"{\"Profile Link\":\"https:\\\/\\\/publishpress.com\\\/wp-admin\\\/user-edit.php?user_id=2\"}","action_username":"steveburge","ip_address":"2600:6c40:5b00:526:9cf0:411:abb6:35e6","meta":"[{\"key\":\"Version\",\"value\":\"1.106.0\"},{\"key\":\"Bulk\",\"value\":\"1\"}]","occurred_at":"2023-07-31T22:50:12.000000Z"}Let’s break down the data in this webhook. This data will vary depending on what kind of information you’re importing from
- id: 29624123
- team_id: 32
- site_id: 27
- site_name: PublishPress
- site_url: http:\/\/publishpress.com
- action: Plugin Updated
- context: Site Kit by Google
- action_user_id: 2
- action_user_meta: {\”Profile Link\”:\”https:\\/\\/publishpress.com\\/wp-admin\\/user-edit.php?user_id=2
- action_username: steveburge
- ip_address: 2600:6c40:5b00
- meta: [{\”key\”:\”Version\”,\”value\”:\”1.106.0\”},{\”key\”:\”Bulk\”,\”value\”:\”1\”}]
- occurred_at: 2023-07-31T22:50:12.000000Z
To continue with our Zapier example, you can use the tools on the Zapier platform to reformat the webhook. For example, in this screenshot below, I’m using the “Format” option to modify the webhook data. The end result is a clean list of the data and you can use in many ways. You can send this data to a spreadsheet, to a commercial SaaS platform, or to your own internal tools.
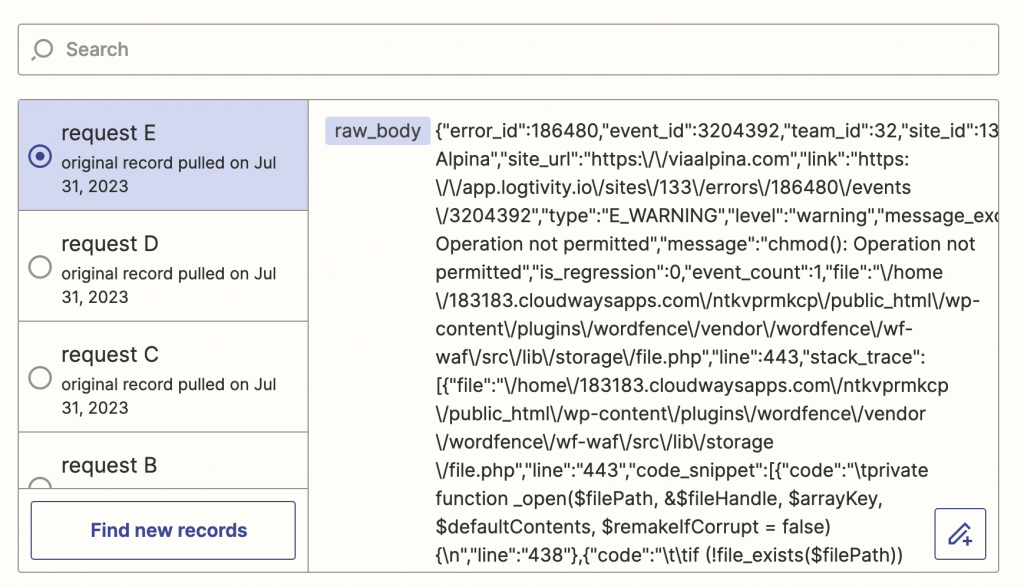
Logtivity allows you to take the same approach for both hosted activity logs and also hosted error logs. This next screenshot shows a webhook with an incident from a Logtivity error log.