How to Customize WordPress Email Notifications to Administrators
If you use WordPress, you have probably received automatic emails sent from your site.
WordPress will automatically generate emails to notify you of certain events. Here are some simple examples:
- When a new user registers on your site.
- When a user submits a comment.
- When a user resets their password.
However, it’s not easy to understand the different events that trigger these emails. There’s no list of these emails in WordPress. And it’s also not straightforward to stop or customize these emails.
In this guide, we’ll help you understand what emails are sent from WordPress, and how you can customize them.
Table of Contents
Option #1. Understand and Customize the Default WordPress Notifications
The best and most complete list of WordPress notifications that I’ve seen is from John Billion, the developer of many WordPress plugins.
This link has John’s list of all the default notifications.
John’s document explains all situations where WordPress core sends an email, how and when they happen, and how to filter or disable each one.
Here’s a quick overview of 10 common situations in which WordPress will send an email. However, this list is far from as complete as John’s.
- WordPress is installed.
- New comments are posted.
- There’s a change of admin email.
- A user changes their email or password.
- A user makes a personal data requests (this the part of the GDPR / privacy tools in WordPress).
- Automatic updates for the WordPress core.
- Automatic updates for plugins or themes.
- New users join the site.
- New sites are added to a multisite network.
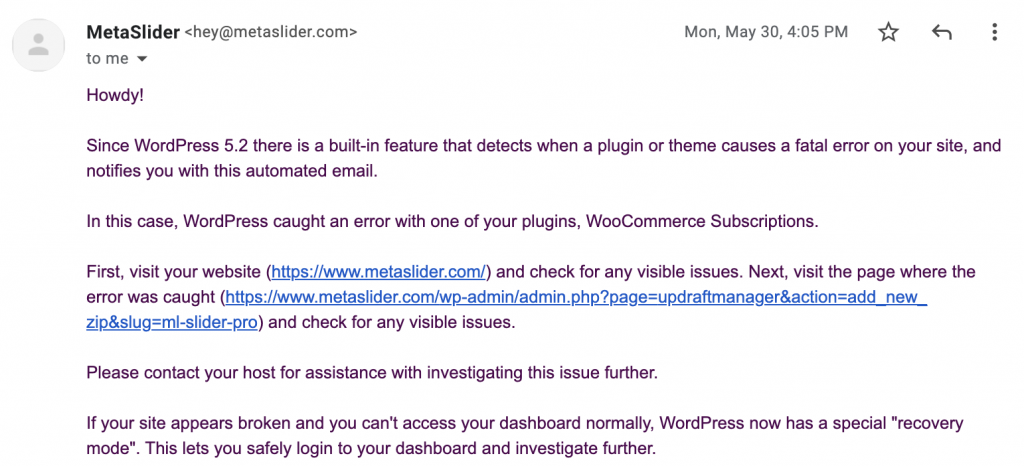
- A fatal error occurs in a plugin or theme.
This next image shows a typical error caused by item #10 on that list. This is the notification for a fatal error on a WordPress site.
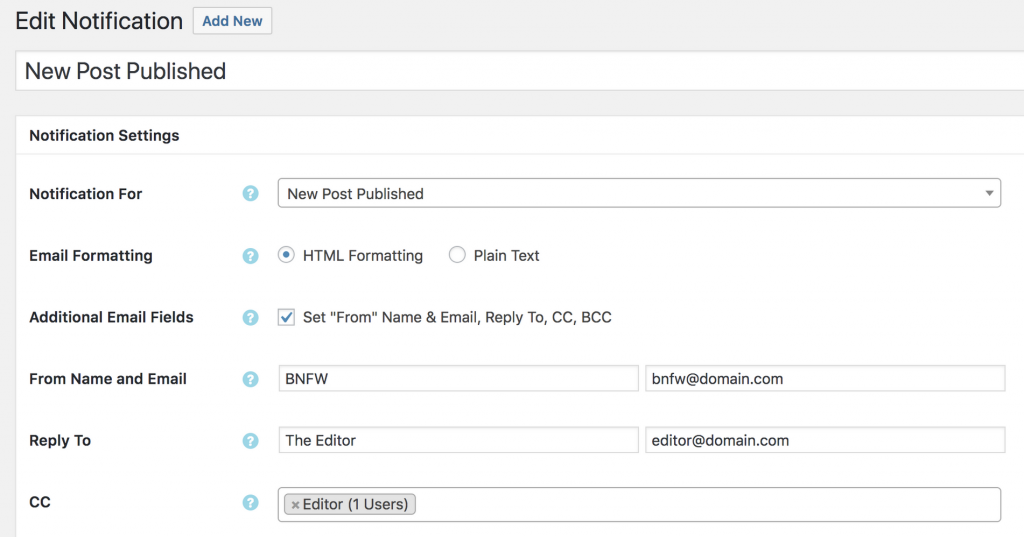
If you want to customize the emails, there’s a wide variety of plugins available. One of my favorites is Better Notifications for WP. With this plugin, you can customize all of the default WordPress email notifications, as well as create new ones. You can choose to send notifications to different users, plus you can change the text and add your own branding.
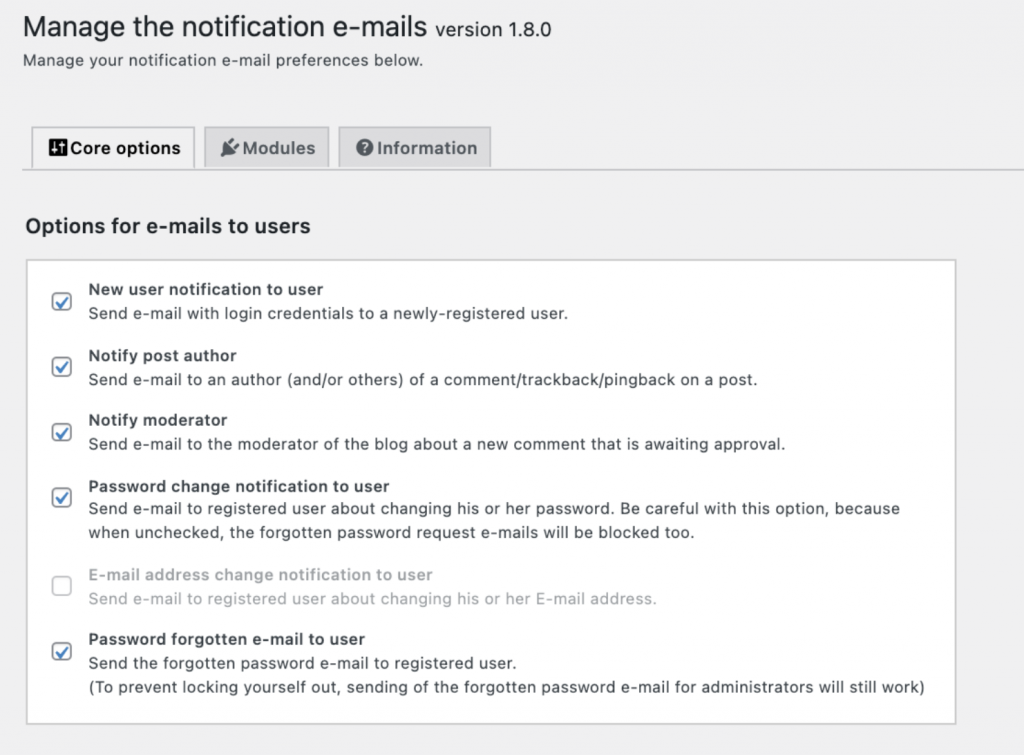
There are also plugins available that allow you to disable the email notifications. For example, the Manage Notification E-mails plugin enables you to choose individual settings for each type of email. I’ve added a screenshot of that plugin below.
Option #2. Create WordPress Notifications for More Events
WordPress has default email notifications that offer the ability to send alerts for key events. There are also plugins, like “Better Notifications for WP”, that do the same.
If you really want flexibility, Logtivity has a feature called “Alerts” that allows you to receive notifications for important events. Alerts can be sent to two Alert Channels: email and also Slack.
Logtivity records your site’s post meta, which means you can track detailed changes across all WordPress post types. Logtivity can record anything stored in the wp_postmeta database table, so you can get really specific:
- Alerts when a new featured image is added to a post.
- Emails when a post has updated Yoast SEO details.
- Slack notifications for SKU changes for WooCommerce products.
- A price change on Easy Digital Downloads products.
You can also create Global Alerts so these notifications can be applied to all your sites. One of the major benefits of Logtivity is that it can track ALL your WordPress sites. This is a big advantage over normal WordPress notifications that must be configured and monitored site-by-site. This screenshot below shows a Global Alert that will notify you when an Administrator user logs in to any of your sites.
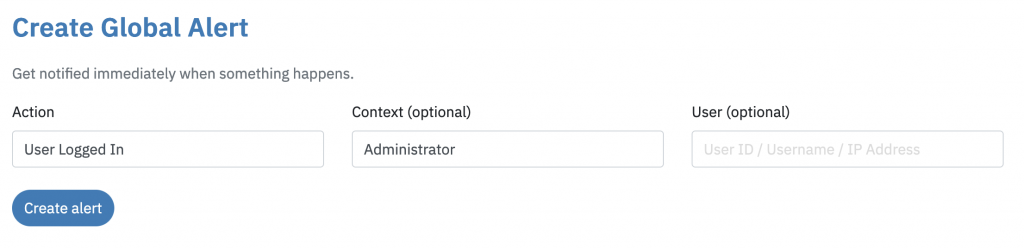
Each alert with Logtivity can be configured with three options. You can see those in the screenshot above.
- Action: This is the trigger for the alert. You will find examples on the “Logs” screen, which include “User Logged In”, “Plugin Installed”, “User Created” and many more.
- Context: This field allows you to specify more information about the Action. Again, you will find examples on the “Logs” screen.
- User ID / Username / IP Address: This field allows you to get notifications for actions performed by a specific user.
Here are some detailed guides to specific notifications you can create for your sites: